Introduction to Dish Hopper Recording
The Dish Hopper is a powerful DVR (Digital Video Recorder) that allows you to record live television, store your favorite shows, and enjoy on-demand content seamlessly. With the ability to record multiple shows at once and advanced features like AutoHop, the Dish Hopper revolutionizes the way you watch TV. This guide will walk you through the steps to set up a recording on your Dish Hopper and provide tips for managing your recorded events effectively.
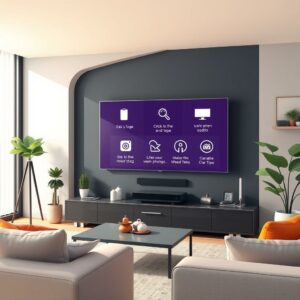
Step 1: Access the Dish Hopper Menu
1. Power On the TV and Hopper: Ensure your TV is turned on and your Dish Hopper is connected.
2. Press the Menu Button: Using your remote, press the “Menu” button to access the Dish Hopper’s main menu.
3. Navigate to Recorded Events: Use the arrow keys to select “My Recordings” or “Recordings” from the available options.
Step 2: Select the Event to Record
1. Browse Programming: Navigate to the “Live TV” or “Guide” section to find the show or event you wish to record.
2. Select the Event: Highlight the show or event you want to record by using the arrow keys.
3. Press the Record Button: Press the “Record” button (often marked with a red dot) on your remote to initiate the recording process.
Step 3: Set Recording Options (Time, Quality)
1. Select Recording Options: After pressing the Record button, you may be prompted to choose your recording options.
2. Choose Start and End Times: Decide on the duration of the recording. You can typically set it to start immediately, or you can choose to record a specific time.
3. Select Quality Settings: Some models allow you to select the recording quality (e.g., standard or high). Choose one based on your storage capacity and preferences.
4. Additional Options: Review any additional options, such as whether to record all episodes or just a single episode.
Step 4: Confirm and Start Recording
1. Review Your Settings: Ensure that your time, quality, and options are set according to your preferences.
2. Confirm the Recording: Press the “OK” or “Confirm” button on your remote to finalize your recording settings.
3. Watch for the Confirmation Message: A message will typically display on the screen confirming that the recording has been successfully scheduled or is in progress.
Tips for Managing Recorded Events
– Organize Your Recordings: Use folders or categories to organize your recordings based on genres or shows for easier navigation.
– Regularly Clear Space: Check your recorded events frequently and delete episodes that you’ve already watched to free up space for new recordings.
– Use the AutoHop Feature: For supported channels, consider using the AutoHop feature to skip commercials in your recorded shows automatically.
– Schedule Conflicts: Keep an eye on conflicts. If multiple shows are scheduled to record at the same time, adjust settings to prioritize your favorites.
– Access Remote Viewing: If you have the Dish Anywhere app, you can access your recordings remotely from a smartphone or tablet, making it convenient to watch on the go.
By following these steps, you can easily navigate the recording features of your Dish Hopper and make the most of your entertainment experience. Enjoy binge-watching your favorite shows without missing a moment!